Friday, January 13, 2023

Don't Fallow if you don’t Rotate and my Triple Sterilization Method

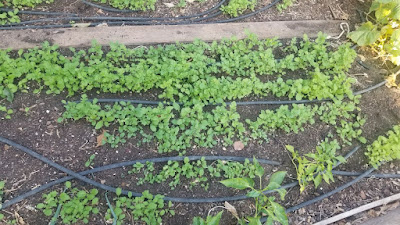
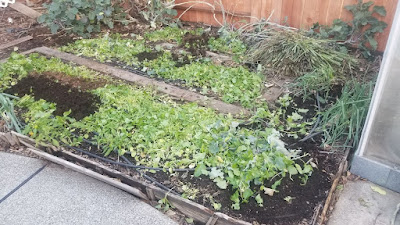
So back in the fall of 2020 I thought of a fabulous idea. What if, instead of going through the work of growing another cover crop this winter, I just fallow the garden instead? With that thought, I decided to cover the garden with plenty of compost and a very nice leaf mulch. Everything went beautifully. That is until it came time to plant. The soil that had once grown healthy vigorous cucurbits was now nearly toxic to my cucumber transplants. All of the plants grew very slowly and performed poorly for several weeks in a row.


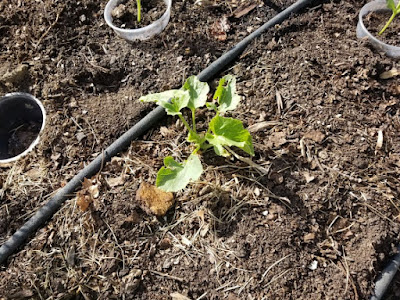
A struggling cucumber plant weeks after transplanting.


To test if the issue was the soil I did the following, which I now call the “Triple Sterilization Method” to clean the soil of any possible disease or pests that might be hindering my crop. Here are the steps to the method:


1. Get a plastic trash bag

2. Remove a layer of diseased garden soil and deposit it in the black bag.

3. Add brassicas and mustard greens (as a biofumigant)

4. Add nitrogen-rich water-soluble fertilizer

5. Add any water to make it moist.

6. Tie off bag and put in another black bag, if needed, to ensure everything is sealed.

7. Put in a warm sunny place (I put it in my greenhouse with the door closed)

8. Wait 1-2 weeks, then dump soil back into place, let it cool, then use for growing.


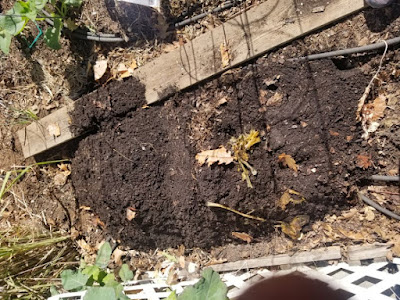
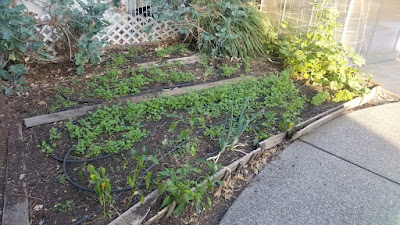
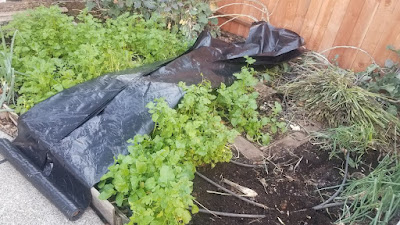
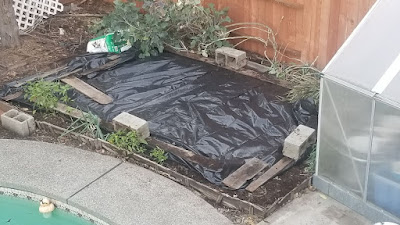
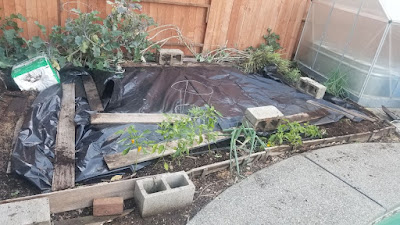
Returning soil to garden after  Triple Sterilization


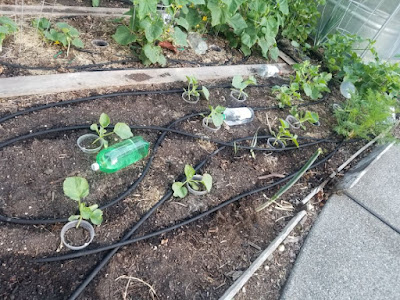
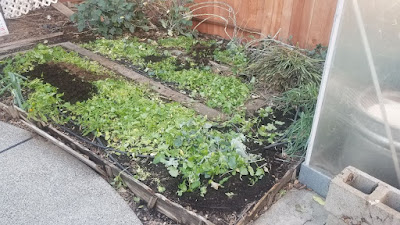
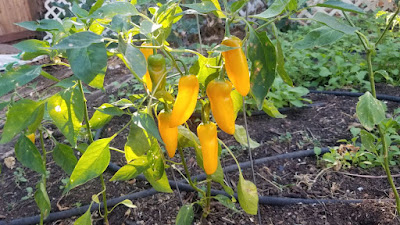
The new thriving plants after triple-sterilizing the soil


So – the reason I named this the “Triple Sterilization Method” is because it uses physical heat, chemical heat and biofumigation as a means of sterilizing the soil. The results were impressive. It was not merely because I had added fertilizer, but because I had removed the pathogens that were holding my plants back from thriving.

Friday, January 6, 2023

Winter Garden Biofumigation

Over the last winter, I decided that it was time to clean up the soil in the entire garden. While most people would have concerns with sterilizing soil, after growing cucumbers in my plot for years and years, I felt it was time to refresh the soil in the entire garden by sterilizing it.


I began by pulling down all of the summer crop that I was growing and clean up all the debris. Then I planted out a blend of mustard greens that have been specifically designed to be used for this purpose. After they grew for a while and were beginning to flower, I tilled them in to the soil and covered the area with soil with my potting soil, watered it in and covered the entire garden with black plastic. Then I waited 2-3 weeks. The next thing I did was remove the black plastic, and incorporate biological fungicides. Prior to growing the mustard greens I had noticed a large amount of fungus that was growing around the roots of some healthy plants. I decided to mine this fungus and refrigerate it until I was done with the biofumigation process. With the biofumigation process behind me, I incorporated the fungus along with the bacterial fungicides, then planted out the fava beans. To summarize, here are the steps to biofumagate your soil.


Measuring the width of the garden


Chopping down the mustard greens


1. Grow brassicas, mustard greens and/or spicy radishes (the more biomass, the better)

2. Till them in.

3. Water

4. Cover with plastic (as soon as possible after tilling) 

5. Remove plastic

6. Allow to gas off

7. Incorporate healthy bacteria and fungi

8. Grow a crop that helps to restore the soil.


Though the plants did relatively well to begin with, weeks of dry winter weather began taking their toll on the growing fava beans. At this time, the fava beans are just getting by with me watering them once every couple of weeks. The relatively rainy weather of Northern California that was common in my youth is gone. As water is life, the prior life that many of us have known for so long in this area has become at least threatened, if not a sweet memory. While we cannot the weather, we trust that blessings will flow as we continue to pray for rain.

Friday, December 30, 2022

Some Thoughts about how I make my Compost

For those who have never composted before, it is pretty simple. Generally speaking, you put a bunch of food stuff (not meat, dairy or fats) in a pile, they decompose and eventually nice soil is made. There are some specific ratios you can utilize to speed up the process and make a “hot” compost that can be ready in a month or two, but cold compost – made by the slow breaking down of material by bacteria, fungi and other living organisms – can often take up to 2 years. In my home we compost a lot of things that we probably shouldn’t. Part of how I can do this is because we have black soldier flies. The larvae of Black Soldier flies is able to eat meat, fat and dairy. In fact, they are extremely effective at doing so – especially in the heat of the summer. When the larvae have consumed the majority of the food in the bin I use for them, I clean out the bin, leaving most of the larvae, and spread the effluent and residual material around in my leaf pile. While I do not make an exact science of my green-brown (nitrogen-rich vs. carbon-rich) material, given that I utilize worms to consume much of the material, it works out pretty well for everyone.


The other aspect to my compost making is leaves. Lots and lots of leaves. The majority of the time, there is only 3-10 days in the fall when I can gather leaves. They are in a neighborhood in another part of the city that has a lot of deciduous trees. I bring my van, lots of black bags and a rake. If I am lucky, I can get a family member or two who is willing to help. I gather the leaves then store them in my backyard as the base for my future compost.


When all the leaves and other stuff has been broken down by worms, bacteria, fungus and bugs, I sift it through some ½ inch hardware cloth (a type of metal screen) then I add it to my pots, plots and anything else I feel will benefit from some additional compost.

Friday, December 23, 2022

My Daughter Plants Peppers

One day my daughter was eating a pepper and asked me if she could plant the seeds. Having dealt with her already planting a peach tree and another unknown tree seed, I was glad to tell her that she could plant an annual (or possibly slightly perennial) plant.


She grew her little seedlings and nourished them. Then, before our trip in June, I told her that she could plant some on the edge of my garden. After our summer trip, she was horrified to see that my cucumber plants had shaded out her pepper plants. I did my best to trim around the plants and keep them alive. By late October, the pepper plants had the remaining light throughout the day.


Based on how the plants grew and that fact that we had purchased them from a big-chain grocery store, I would infer that the seeds were hybrid and that the large variation in size had something to do with the fact that the peppers had different parents. But that being said, the peppers were still pretty good.

Friday, December 16, 2022

Growing the ML Barese in the Fall

So I decided to grow the Mezzo Lungo Barese in the Fall. This was after previously growing it earlier in the fertile garden. According to a friend of mine, who we will call Angelo, the Mezzo Lungo Barese is supposed to be much like the Mezzo Lungo (or medium long) of Polignano – except the Mezzo Lungo Barese is longer. So, after selecting out the longest fruit from a trial done in my friend’s fertile garden, I grew out from the seed I had saved earlier.


The couple plants grew quickly and well. There was one thing that was a bit disconcerting though. The fruit kept cracking. I kept pulling the fruit whenever it would crack. Only later did I think about what the physiological reason for the cracking might be. It turned out that there was a period of time in which there was no water going to the plant. This caused the fruit to crack. Once I resolved the water issue and made sure that the plants had consistent water restored, then the fruit cracked again because the older outer part of the fruit could not keep up with the swelling of the inner flesh of the fruit.


In the end, I did end up saving a little bit of seed and eating a number of Mezzo Lungo Barese. As carosello go, they are alright. Not my favorite, but definitely not the worst. In the near-term, I am planning on growing this variety out again as soon as I get another chance.