Friday, September 5, 2014

Visiting the U of A Pima County Extension Garden

The Pima County Master Gardeners are hosting free tours on select mornings.

So - I read that the Pima County Master Gardeners were hosting a tour of the U of A Extension Gardens on Campbell Avenue this fall. Though I knew that the times included every Saturday at 9:00 am I did not check to make sure that they were hosting the event  when I visited on August 30th.


So – my daughter and I had a little self-guided tour of the garden.


Browsing the All-American Selections (AAS) Winners


Mascotte Bean - An AAS Bush Bean (with no beans on it)


An AAS Winning Flower


A Cayennetta F1 Pepper, as the sign states.


My daughter enjoyed walking around, but like me – she was not very impressed that no one was there. Hopefully, in the future, I will read things more carefully before I jump in the car to go across town.


Egg Plants grow very well in warm Arizona.


A few long Eggplants.


Some Okra Plants


My kids love most veggies - except Eggplant and Okra


A few of the Peppers at the County Extension Garden


Ordono Peppers - the healthiest pepper variety I saw.


Bell Peppers


Some form of Sorghum


Sweet Potato Vines


The tomato varieties.


I cannot leave my tomatoes un-kept like this.


For those of you who would like to see the gardens, they are in Tucson on Campbell Avenue on the east side between River and Ft. Lowell. When I traveled there, I parked in the community parking lot just north of the gardens. For a schedule of the dates when the garden is doing tours, see below.


My daughter posing as a carrot. (=


A healthy Artichoke plant that will surely produce plenty of spring chokes.


Some feathery Asparagus stalks


Immature Grapes


A Little Bunch of Grapes


A Row of Bush Beans


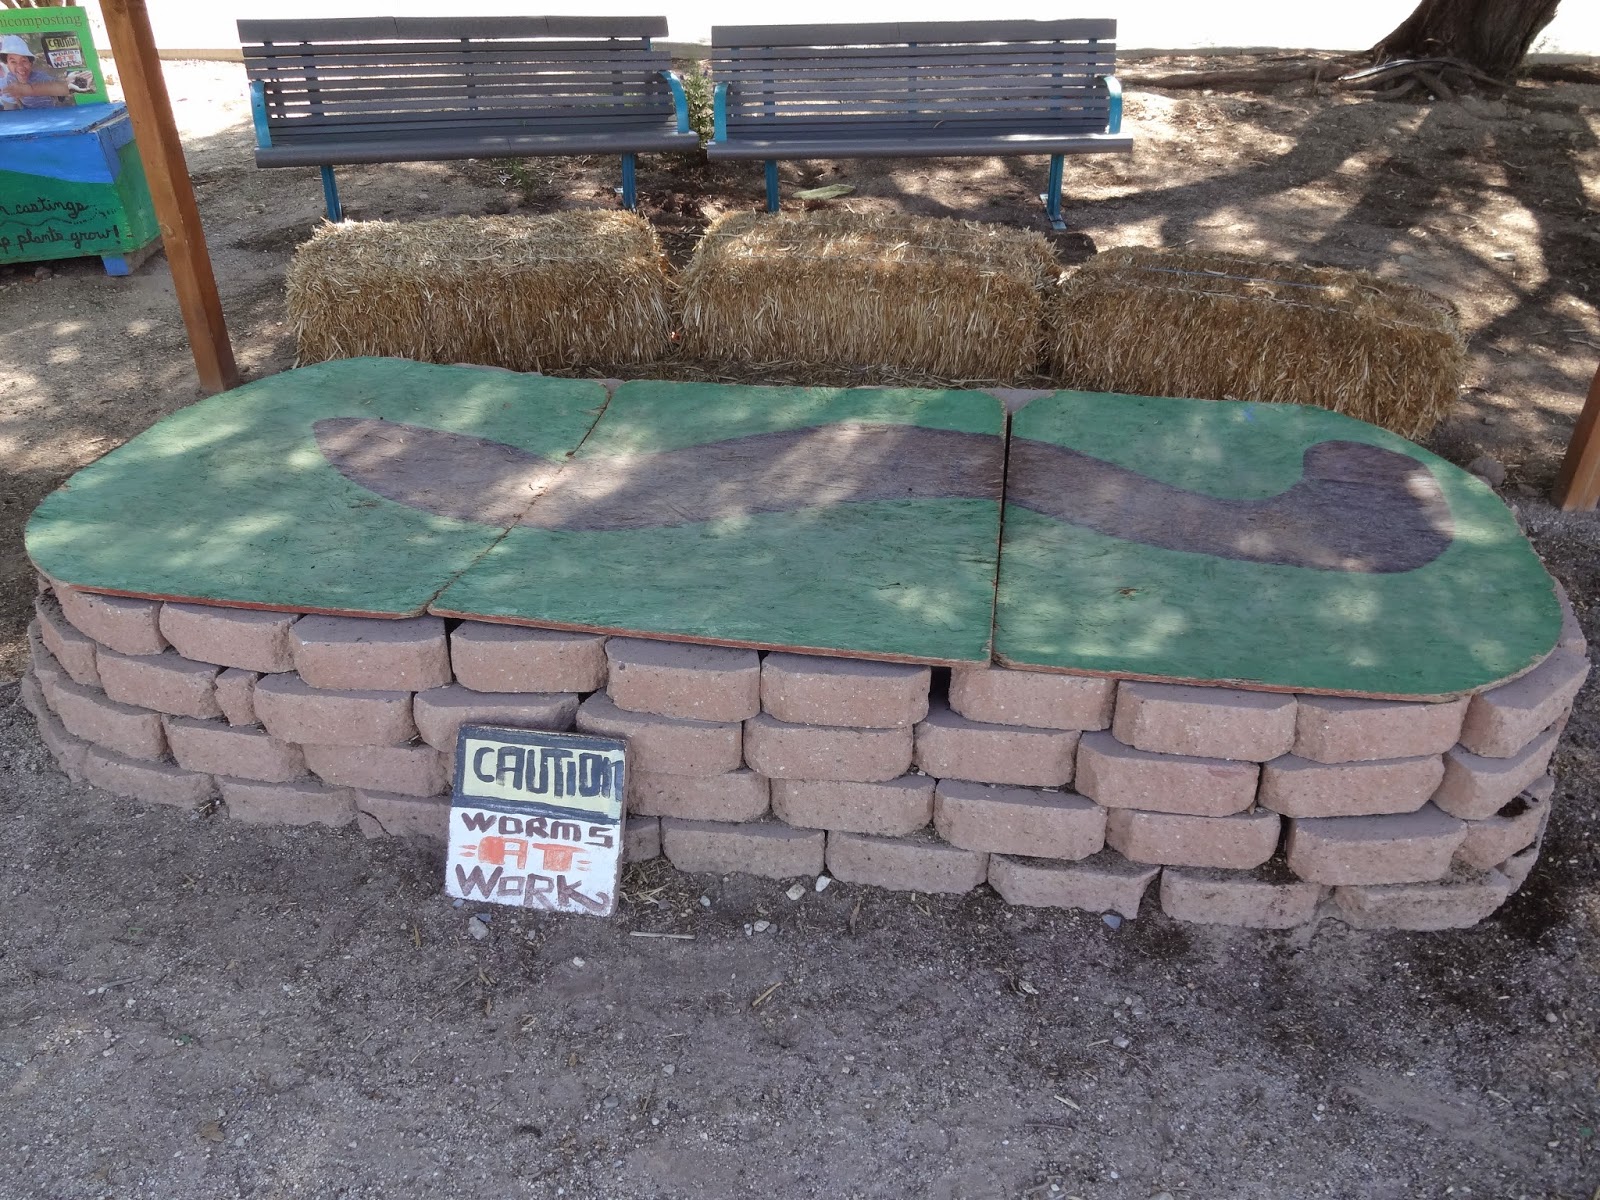
My daughter at Tucson Village Farm


A large Armenian Cucumber - possibly still edible


Armenian Cucumber - Perhaps being grown for seed?


This one is definitely for next year!


Another Large Armenian - At this point the flesh is more like carrots.


Mexican Sunflowers


Bees on small flowers


Bees Pollinating Mint


Bees Pollinating Onions


Bees on an onion plant


A red caterpillar.


Another look at this red caterpillar


A black swallowed tail butterfly on a Mexican Sunflower


There were plenty of insects at the U of A gardens


A nice big spiderweb


Spider on Pepper Leaves.


I really like this vermicompost setup.


My daughter came prepared to take notes.


I really liked this little solar oven.


Instead of taking a self-guided tour (as I did) let a Master Gardener provide a tour of the gardens for you. Here are the tour dates for Fall 2014:

September – 9:00am every Wednesday and Saturday.


October - 9:00am every Wednesday and Saturday.

November - 9:00am every Wednesday and Saturday, except the Week of Thanksgiving.

December - 9:00am every Wednesday and Saturday, except the Week of Christmas.
 
I received this information by subscribing to the Pima Master Gardener’s listserve, which can be found at: http://calsmail.arizona.edu/mailman/listinfo/pimamastergardeners


A pair of Zebra-Tailed Lizards. They move their tails like worms! (=


My daughter tried catching a smaller one of these. She didn't have a chance!

Monday, August 11, 2014

Getting Cucurbits off to a Good Start

Some Pre-sprouted Cucurbit Seed.
Because a seedling requires photosynthesis to grow into a thriving plant, the longer a seedling grows without sunlight the more it uses up its energy reserves in an attempt to expose its leaves to sunlight. The seedling that can pull its leaves from the seed coat quickly will begin to process sunlight earlier so it can grow strong and large before weeds, predators, and temperatures become unfavorable. Effective gardeners provide an optimal environment for each plant to grow so that the plant, in turn, will produce leaves, flowers and fruit much earlier than it would do in nature.


A cucurbit seed with roots (left) and primary leaves (right)


Cucurbitaceae  or Cucurbit seed, including squash, cucumbers, melons and their relatives tend to emerge from the seed coat in a uniform fashion with the root emerging before the primary leaves. As the primary leaves develop, they fill out until they can finally break free of the seed coat. Depending on the seed quality and the environment provided, cucurbit seedlings can require less than 1 day or over 2 weeks to emerge. Although seed quality is not a factor that most gardeners have total control of, each gardener possesses a large portion of control over a seedling’s initial environment.


In a previous post I outlined some tips for exposing cucurbit seeds to an environment in which they will sprout. Once a seedling is almost finished sprouting and its primary leaves begin to push off their seed coat, a gardener can ensure that the seedling sprouts earlier by how they position the seedling in the soil. Although various gardeners may find different methods for getting their cucurbits off to a good start I wish to show one method that I’ll call “seedling positioning” that I believe enables seedlings to quickly expose their primary leaves to sunlight.

 
1. First, you presprout the cucurbits. If you are unfamiliar with presprouting cucurbit seeds there is a little guide to the process at the bottom of the page at Cucumbershop.com.


2. Then you make sure the soil you wish to plant in has been watered deeply, then left to dry until the soil is workable (not soaking).


Illustration of initial soil, with broken line representing ground level.
 

3. Then, you dig one small trench.


 4. Then another next to it.


5. Compact the dirt in between each trench to make a bump or island between the two holes that can support the middle of the cucurbit seed.


6. Then place the cucurbit seed with the root in the soil at one side and the primary leaves and seed coat on the other side.
 

Drawing of seed placement or positioning


Photograph of Seed Placement (or positioning)


7. Fill in the root portion of the soil to the soil line above the bump, leaving the middle of the seedling exposed.


8. Fill in the area above the primary leaves and seed coat with soil to the soil line, compacting the soil or leaving a small rock above the seed coat. By weighing down the seed coat the primary leaves will be able to pull out of the seed coat without taking the seed coat with it.
 
 
Burying all but the midsection of the seedling.


Note: 7 and 8 Can be interchanged. I actually prefer to fill in the seed coat first to hold the seedling in place.


Putting Dirt on the Seed Coat First


9. Leave the middle of the seed exposed or gently brush around where you last saw it until it is exposed.
 
 
Adding dirt over the roots (Palo Verde branch marking exposed portion of seedling).

 
10. Keep from directly watering on the seedling (you can water near the seedling) until the seedling has sprouted.


With the seedling correctly placed in the soil it can sprout quickly.


This time red arrows denote where the seeds are beginning to spout.


In 1 day the sprouted seedlings have emerged because of their placement in the soil.


Although I have not attempted a side-by-side trail of using vs. not using my seedling positioning technique I have noticed that positioning the seedlings so that they receive sun quickly enables them to grow quickly. I hope that other gardeners are able to find that positioning their seedlings helps them as much as it has helped me.


Happy Gardening!