Friday, May 6, 2022

Fertile Garden Cucamelons

A friend of mine has a garden which I refer to as “The Fertile Garden”. He graciously allows me to grow vegetables there along with what he already grows himself. I honestly owe him quite a lot for allowing me to grow in his yard for so many years.


2020 was the first year that I tried growing cucamelons, mouse melons or Sanditas (Melothria scabra). There were two primary reasons why I decided to grow them. The first was to be able to try them out. A lot of people had raved about their taste and their productivity. The second reason why I decided to grow them out was to produce high quality seed. Though there are some companies that produce high quality cucamelon seed, my access to this seed was spotty, at best – and I wanted to make sure that I was able to better understand how to grow it, harvest it and process the seed.


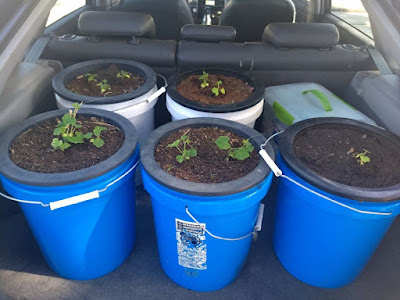
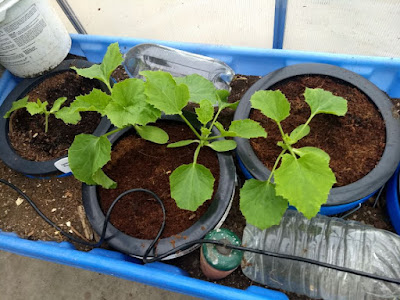
Knowing that cucamelons require a long amount of time to mature, I began them in 2-inch soil blocks early in the season, then transferred them to 10” hydroponic baskets. I was able to set the hydroponic baskets into 5-gallon buckets which I set in another part of the fertile garden until there was room along the south side of a chain-link fence.


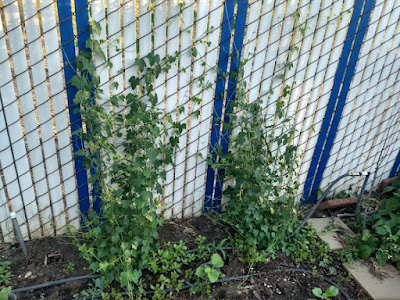
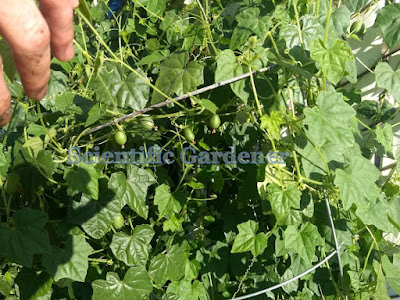
The fence provided a perfect place for the cucamelons to thrive. They continued to grow, little by little up the fence and they became quite productive. Occasionally they would fall off, and I would harvest them. I continued harvesting them off the ground, little by little until it was the end of the season.To me, the taste of cucamelons is relatively bland. While they can be considered slightly juicy, the texture and taste are not extraordinarily exciting. The slight acidic flavor does not taste much like lemon. The best description I have for the taste of sanditas is “cucumber peel”.


Somewhere near the end of 2020 or beginning of 2021 I harvested the remainder of the cucamelons. In order to save time, I cut down the vines one section at a time and rolled them up like it was rug or large section of carpet. I then brought them over to a level concrete area and shook the mat of vine against the ground until the majority of the fruit dropped off. Then I inspected each section and picked off any remaining fruit. Instead of just composting the vine mats, I decided to utilize them as a weed block for large sections of the garden bed. The plants did an incredible job of suppressing weeds during the winter months and took quite a while to decompose.

Friday, April 29, 2022

Some Considerations to Make before Container Gardening

While containers can be a fantastic option for those who cannot grow in the ground, they do present a number of challenges. For me, two of the biggest concerns with containers are container volume (how much the container can hold) and a lack of insulation (how much the container is effected by variations in daily temperature fluctuations). The larger a container can hold, the larger the plant’s roots can grow. Likewise, there is a incredible amount of damage that can happen to the roots of plants in containers during the summer.


Even if growing in white buckets, the temperature of the soil just inside the plastic in a 5-gallon-bucket by the end of a summer day can be much hotter than the outdoor temperature. Temperatures more akin to solarization will damage the roots of most any vegetable plant. This occurs because the container is exposed to both direct sunlight and radiant heat from outside of the container. While there are ways to mitigate this concern (insulating a container and growing in a larger container) know that the first several inches around most non-insulated containers can be designated a “dead zone” and that, as the spring turns into summer, the “dead zone” will only increase until the plant is so stressed that it will no longer support fruit growth.


Am I against growing in containers? Not at all! I do it. But if the vegetable grower does not take into considerations the risks and disadvantages of doing so and understands the limitations that container growing presents, then – with proper thought and planning – a small crop of whatever can be grown in containers. Would growing in a 5-gallon-bucket work for a giant pumpkin? No. Nor would it work well for an indeterminate tomato variety. Would it work for growing something for 2-3 months. Yes it would – if you take the above issues into consideration.

For further reading:

Here is a blog post about me growing in hydroponic baskets in 5-gallon-buckets

And some of my experience doing so in the greenhouse.

And outside of the greenhouse.

Though not perfect, this article talks about the consequences of heat stress on plants and what some possible solutions to heat stress may be.

Friday, April 22, 2022

Planting in 10 inch Hydroponic Baskets

One of the things I greatly enjoy about gardening is that it provides endless opportunities for learning. Though the gardener may grow a variety of vegetable in the garden one year, changing a couple factors the following year can dramatically change the outcome of the crop. A particular issue that many gardeners experience is limited space in the garden bed to grow their crop. While some choose to remedy this problem by growing in containers, container growing can be especially challenging in areas with intense sunlight or heat. Unless the gardener has the resources to obtain a very large container or one that is somehow insulated from the worst aspects of the climate, direct sun hits the sides of the container and, when combined with heat, can damage roots or dry soil to the point at which the plants suffer, dither and their health in general deteriorates.


My experience with gardening in containers has been like this. Even in a very large wine barrel, the plants in the container do not live to their potential and if they produce, the fruit is smaller and the harvest is much less. So now I generally garden in containers only when I am experimenting with a variety that I just need some basic information about or I grow in containers with the intent to place the entire container into the ground. By using a 10” hydroponic basket I am able to solve the issue of “not enough space” by growing my plants in a container until a spot in the garden opens up for me to plant.


10 inch hydroponic baskets are definitely a mixed blessing. Here are some of the pros and cons of using them as a method of transplanting into a garden:


Pros:
-Fits perfectly into a 1-gallon container for ease in initial growing and transporting to the garden bed-Makes it possible for transplants of a very large size.
-Enables the gardener to maximize harvests of multiple summer crops in a small area.
-Fragile roots of the plant are not put in a state of “shock”.
-Roots grow through the basket and make use of the nutrients, moisture and biology already present in the soil.
-Dramatically increases the survival rate of plants because they are both larger when being transplanted and because the lip of the basket can be placed just above the soil line (as a barrier to creeping critters)
-Mitigates disease for the observant gardener by keeping disease contained to the soil in the basket. The gardener can remove the plant from the garden before disease spreads any further.

Cons:
-Damages soil by requiring the gardener to make a hole that is over 10 inches in depth and width.
-Dramatically increases labor required to plant the crop (labor is multiplied by 3 or 5 times what it normally would be in preparation of the soil, growing the plant and in transplanting of the basket)
-Dramatically increases labor required to remove the crop (labor is multiplied by 5-10 times what it normally would be in removing the basket, leveling the soil, in repurposing the soil and cleaning the basket)


In talking about transplanting large hydroponic baskets, I don’t want to paint too rosy a picture of the work involved. First one needs to get the baskets, then compact soil into the basket. If there is not enough compaction, the soil will fall through the cracks. Then the seeds or soil block is planted into the basket. It generally takes more time to water plants in 5-gallon buckets than in the ground. To transplant, the gardener needs to dig a hole that is over 10 inches in width and depth, then fill in the soil so that it is in complete contact with the bucket. Any trellising needs to work with a 10 inch plastic container. It requires much more time and energy than regular planting of seeds or soil blocks would.


At the end of the season, when the plants have been removed, the work required is even greater. The basket is carefully removed (now that the roots have grown through the container and established themselves in the garden, they need to be torn free to be able to remove the basket). Then the hole in the garden bed is filled, leveled and the soil in the basket is repurposed. Then the basket is cleaned, dried and stored for the next season.


On the flip side, the benefits are amazing. If the gardener has minimal space and planting time, the gardener can make a lot of use of the limited time they have to grow a whole lot. The old crop can be replaced by transplants that have grown for 4-6 weeks. If fruit is not already set on the plant, the plants are so large that fruit develops quickly. Transplanting 10-inch hydroponic baskets is not for everyone, but the ability to get multiple from seed to harvest in the time it would take to get one crop to maturity may be worth all the work involved.


Last, but not least, here is a video to demonstrate a little about how this is done: