Showing posts with label Transplants. Show all posts

Friday, October 27, 2023

Harmony Organics Soil Trial

While I did purchase soil from a local landscape supply company early in the season it turned out that whatever was in the soil was not necessarily appropriate for growing vegetables in. So I looked around for organic soil suppliers until I found Harmony Organics in Benicia, California.


From Harmony, I tried out four different soil mixes. My primary goal of the trial was to find a mix I could use for soil blocks and to directly plant in – for raised bed gardens. A “super compost”, a raised bed mix, “Grower’s Premium” promix and a mix that they called “MoBetta”. To do the trial properly, I used healthy seed with good germination and made sure that they had all sprouted prior to putting them in 2” soil blocks made from each of the 4 different mixes.


While the super compost and the raised bed mix didn’t do that well, the Grower’s premium did extremely well to begin with. By the end of the trial though, only all of the seedlings in the “MoBetta” section had sprouted out. I decided that I really needed fertility in my gardens, so chose the Grower’s premium promix for my raised beds. As the MoBetta had more peat and coir, I decided that I could add these to the Grower’s premium to make my soil blocks.

Friday, April 28, 2023

Transplanting Sensitive Seedlings using Strawberry Baskets, or Tills

At the same time as I was planning out my Mezzo Lungo carosello trial, I was looking for a replacement for 4-inch soil blocks. Having sold off my 4 inch cubic soil blocker in 2020, I worked off and on throughout the winter to find a comparable replacement for the need to “pot up” 2 inch soil blocks. The issue is that if the plot where the 2” soil blocks are supposed to be planted is not ready, then the roots will struggle to continue to grow. Past experience taught me that this only results in stressed plants that will only experience pests and disease as a result. To avoid this problem, I needed a 4” solution. I looked at net cups, hydroponic baskets and square Vanda orchid baskets – but all of these solutions usually ended up not being large enough, not being the right shape to fit in a 10x20 seedling tray or being much too expensive to be practical.


Eventually, I ended up finding strawberry baskets. These would allow the soil to be mostly contained and the roots to grow through the gaps. After purchasing and returning old cheap baskets from Amazon that were the wrong size, I purchased s dozen nearly 4” square green plastic strawberry till baskets from Glacier Valley Enterprises – just to try out. While shipping for the initial product was expensive and the shipping for the actual product was worse, the baskets worked wonderfully. Though I was not necessarily wanting to use the baskets for all my planting, I realized that to get a head-start on my spring garden, I needed to have the baskets ready to go.


Good thing I had those baskets ready, because they really saved the day when the plot for my 2” seedlings was not ready to go. I was able to transplant my cucumber seedlings into the 4” strawberry baskets and the plants were able to grow until to full maturity – when I had to remove each plant and its plastic basket. 


So here are the pros and cons of utilizing Strawberry Baskets for transplanting seedlings with sensitive roots: 


Pros:

-These containers buy the gardener 2-4 weeks more time for the garden bed to be ready

-It is quick and easy to put soil into the container and pot-up the 2” soil block

-Easy to transplant the 4 inch container into the ground

-The container is reusable and is easy to wash using a dish-scrubbing brush


Cons:

-You have to go back and find the plastic container. This can be a bit of a chore – especially if the plant died prematurely or if transplanting in clay soils.

-There is a possibility of leaving some of the plastic in the ground

-Sometimes the container can be damaged and need to be thrown away.

-The containers are probably not UV resistant, meaning that they do not hold up well to sun damage.

-While the containers are reusable, they still need to be washed

Friday, April 22, 2022

Planting in 10 inch Hydroponic Baskets

One of the things I greatly enjoy about gardening is that it provides endless opportunities for learning. Though the gardener may grow a variety of vegetable in the garden one year, changing a couple factors the following year can dramatically change the outcome of the crop. A particular issue that many gardeners experience is limited space in the garden bed to grow their crop. While some choose to remedy this problem by growing in containers, container growing can be especially challenging in areas with intense sunlight or heat. Unless the gardener has the resources to obtain a very large container or one that is somehow insulated from the worst aspects of the climate, direct sun hits the sides of the container and, when combined with heat, can damage roots or dry soil to the point at which the plants suffer, dither and their health in general deteriorates.


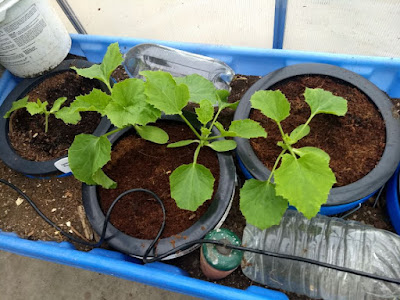
My experience with gardening in containers has been like this. Even in a very large wine barrel, the plants in the container do not live to their potential and if they produce, the fruit is smaller and the harvest is much less. So now I generally garden in containers only when I am experimenting with a variety that I just need some basic information about or I grow in containers with the intent to place the entire container into the ground. By using a 10” hydroponic basket I am able to solve the issue of “not enough space” by growing my plants in a container until a spot in the garden opens up for me to plant.


10 inch hydroponic baskets are definitely a mixed blessing. Here are some of the pros and cons of using them as a method of transplanting into a garden:


Pros:
-Fits perfectly into a 1-gallon container for ease in initial growing and transporting to the garden bed-Makes it possible for transplants of a very large size.
-Enables the gardener to maximize harvests of multiple summer crops in a small area.
-Fragile roots of the plant are not put in a state of “shock”.
-Roots grow through the basket and make use of the nutrients, moisture and biology already present in the soil.
-Dramatically increases the survival rate of plants because they are both larger when being transplanted and because the lip of the basket can be placed just above the soil line (as a barrier to creeping critters)
-Mitigates disease for the observant gardener by keeping disease contained to the soil in the basket. The gardener can remove the plant from the garden before disease spreads any further.

Cons:
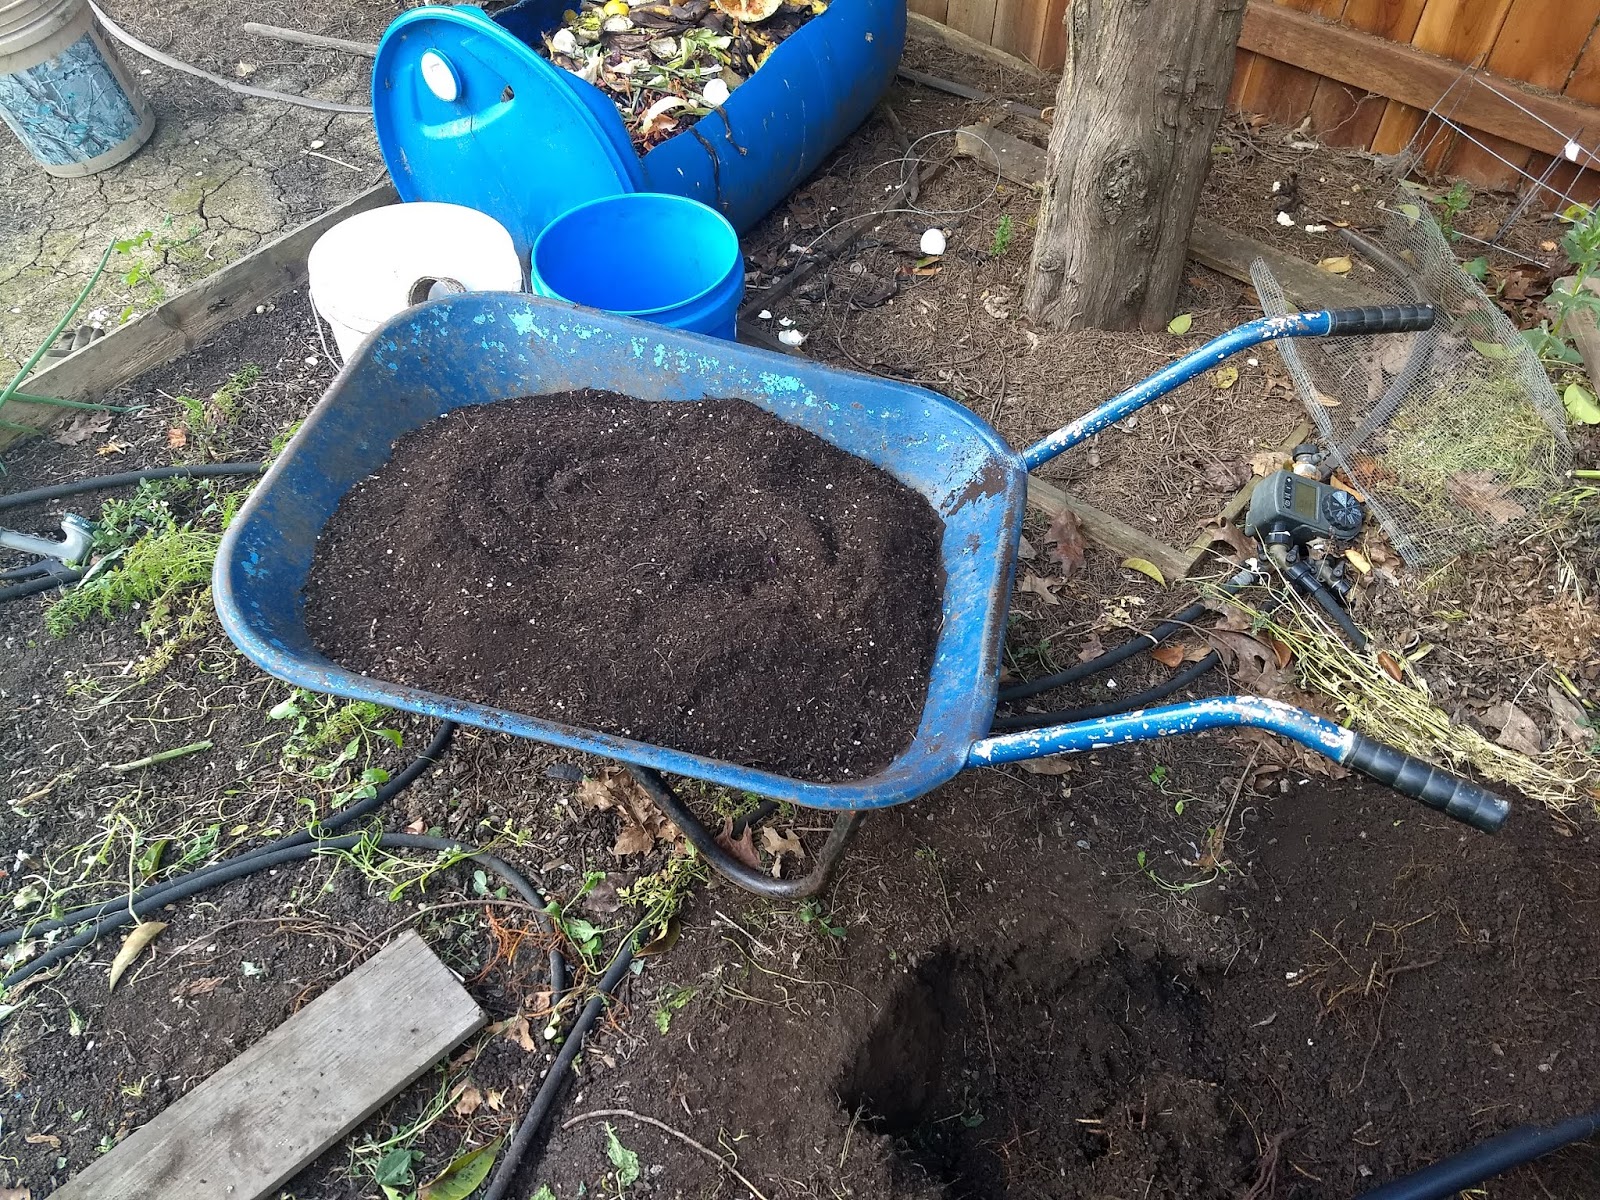
-Damages soil by requiring the gardener to make a hole that is over 10 inches in depth and width.
-Dramatically increases labor required to plant the crop (labor is multiplied by 3 or 5 times what it normally would be in preparation of the soil, growing the plant and in transplanting of the basket)
-Dramatically increases labor required to remove the crop (labor is multiplied by 5-10 times what it normally would be in removing the basket, leveling the soil, in repurposing the soil and cleaning the basket)


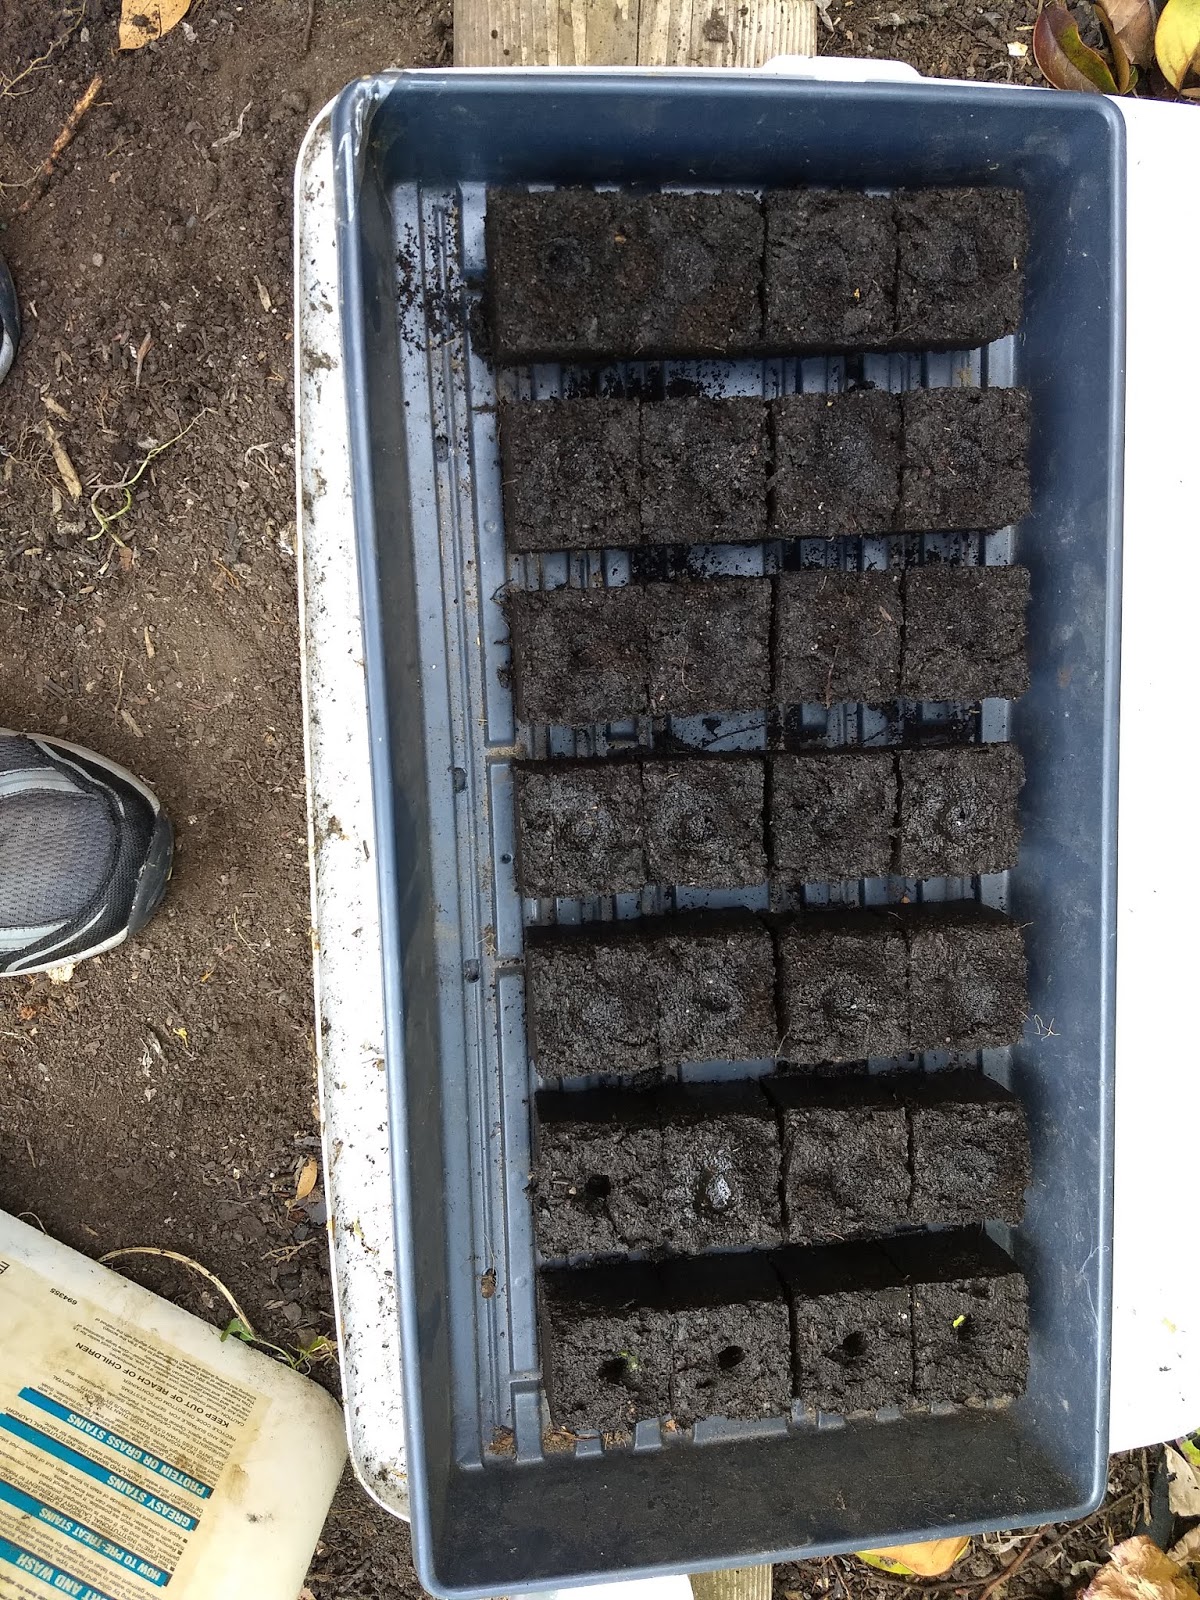
In talking about transplanting large hydroponic baskets, I don’t want to paint too rosy a picture of the work involved. First one needs to get the baskets, then compact soil into the basket. If there is not enough compaction, the soil will fall through the cracks. Then the seeds or soil block is planted into the basket. It generally takes more time to water plants in 5-gallon buckets than in the ground. To transplant, the gardener needs to dig a hole that is over 10 inches in width and depth, then fill in the soil so that it is in complete contact with the bucket. Any trellising needs to work with a 10 inch plastic container. It requires much more time and energy than regular planting of seeds or soil blocks would.


At the end of the season, when the plants have been removed, the work required is even greater. The basket is carefully removed (now that the roots have grown through the container and established themselves in the garden, they need to be torn free to be able to remove the basket). Then the hole in the garden bed is filled, leveled and the soil in the basket is repurposed. Then the basket is cleaned, dried and stored for the next season.


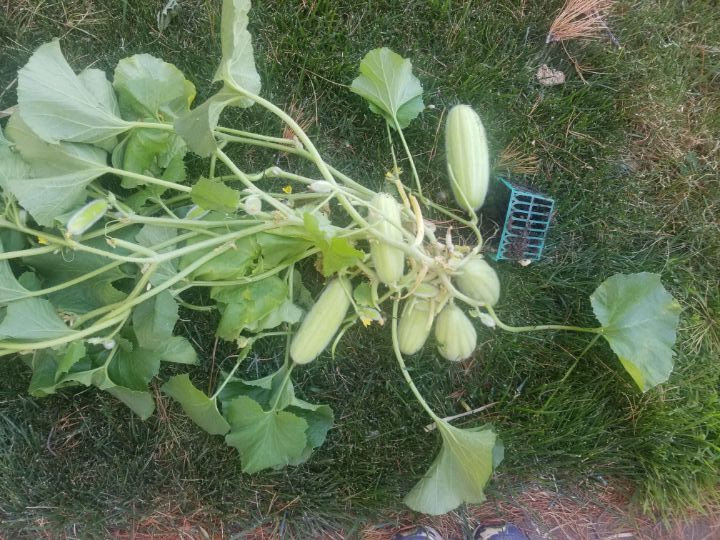
On the flip side, the benefits are amazing. If the gardener has minimal space and planting time, the gardener can make a lot of use of the limited time they have to grow a whole lot. The old crop can be replaced by transplants that have grown for 4-6 weeks. If fruit is not already set on the plant, the plants are so large that fruit develops quickly. Transplanting 10-inch hydroponic baskets is not for everyone, but the ability to get multiple from seed to harvest in the time it would take to get one crop to maturity may be worth all the work involved.


Last, but not least, here is a video to demonstrate a little about how this is done:


Saturday, July 6, 2019

Using soil blocks for Cucumber or Melon transplants

Back when I lived in Tucson, I would be able to sow pre-sprouted cucumber seeds around the first of March. Or, at least, I could try starting them then. Starting something that requires warm soil, such as melons was always a challenge – but I was always able to do so with some water-filled jugs to help speed the growing process along. Very few pests are present in a desert backyard in March, unless they somehow lived off something nearby long enough to get them through the winter.


Sprouting cucumber-melon seeds


However, now that I live in Northern California – where the weather will often be cool and rainy until May – it is quite difficult to start anything outside early. Even in May when we get warmer days, the nights are often too cool for growing something that requires consistent heat. The cool temperatures coupled with wet soil can enable snails, slugs and other pests to outcompete with any kind of cucumber seedling. Though I have tried growing out seedlings in the past with mixed results, I believe that this year I have finally figured out how to successfully grow out my cucumber-melon transplants.


A soil block with a sprouting cucumber


Before I get too far into this, perhaps I should answer the question, "What is a soil block?" A soil block is a mixture of organic or inorganic material that is compressed to make a pseudo-pot that can degrade directly into the garden. Though soil blocks require time to learn how to make, they offer quite a few advantages that I’ll explain later. First - here is how I am currently making my soil blocks:


1. I pick the cucumber-melons to grow, then put them into a Ziplock bag with a moist paper towel in a warm place to pre-sprout them. I diligently check the pre-sprouted seed during the first 24 hours. Healthy seed can sometimes grow slowly – but sometimes very viable seed can not only sprout, but produce long roots in less than 24 hours. Keep checking the seed for the first 3-5 days until all seed has sprouted.
 

Presprouting cucumber-melon seeds


2. As soon as the seed has sprouted, put the seed in the soil blocks. I start my transplants in a 2” Ladbrooke soil block. Currently, I am using a mix of peat moss, compost, finely sifted native dirt and a little topsoil in my mix. Sifted compost seems to be the best at keeping everything together. Although pearlite or vermiculite should be added, I have not made the time to locate a good supplier of these materials in my area. I’m sure you can find recipes for soil block mixes online – but it may be wise to consider how much native material can be utilized before going out to buy something unnecessarily. 


sifted fine garden soil


Closeup of the soil


Soil block mixture ready to go


Compressed coco coir block (a peat moss alternative)


After adding at least 5 gallons of water to the compressed block


Some materials I use in making soil blocks


Pressed out blocks from the 2 inch Ladbrooke soil blocker


When putting the seed in, it is important to ensure that the end of the seed coat does not go straight up. If the root grows the seed straight up, there may not be enough abrasion to enable the seed to shed its seed coat. The longer the seed keeps its seed coat on, the more energy that the plant is using up to push the seed coat off. If a seedling takes too long to shed its seed coat, it may run out of energy to do shed its coat before photosynthesis can take place. 


Pre-sprouted seed put in upside down (with the roots up)


If your seedlings have small sprouts coming out, it may be wise to transplant them either sideways (preferable) or upside-down. In one experiment I did with my soil blocks this spring, I dropped all the pre-sprouted seed in the soil blocks with the roots going straight up. Though I lost a couple seedlings through them working too hard to figure out which way was up, it generally worked very well at ensuring the seed coat was removed by the time the seedling emerged from the top surface of the soil block.


Now all are covered


The resulting seedlings


3. Growing out the transplants until they are big enough to put into a pest-infested garden is important. Even though I can put barriers around my cucumber plants, it can often be difficult to ensure that barriers are secure enough to keep critters from nibbling on your plants. The thicker the stem is, the better chance the plant will have. Additionally, as I start my transplants in the greenhouse, taking a little longer to transplant in the spring gives my warm-loving plants a longer time in ideal conditions before exposing them to cold temperatures. I have found that, by starting my transplants out with plenty of light reduces the time required to harden them off.


Seedlings about ready to be transplanted


4. Prior to transplanting, I make sure that the garden soil has plenty of finely sifted compost or other amendments added in. This helps to ensure that the transplants will grow quickly and out-compete other plants or critters.


Garden with Fava bean plants cut to the ground (roots left in soil)


Adding compost and amendments


Adding mulch and seedlings


Adding transplants with a barrier to protect against critters


So, here are some things I have discovered about using soil blocks:


-Making soil blocks takes time: You definitely need a couple hours to learn how to make soil blocks. There is a learning curve. However, once you get a hang of it, the process can be quite simple.

 
What happens when I add a tiny bit of Miracle Grow to my seedlings


-The main advantage to using soil blocks with cucumbers or melons is the ability to keep transplants from having their roots disturbed. Except for times when I really mess up my soil block mix (it can happen) soil blocks are much better at keeping the roots of cucumbers and melons in one solid mass until they are placed in the soil. Once they are placed in the soil, they automatically begin to grow out. They are no longer bound in the block and there is no “transplant shock” which means that the plant can go from pre-sprouted seedling (saving a week or two over direct seeding) to a soil block (a safe environment for the seedling to grow) to the garden without any times where the plant it having to adjust to a completely new environment. As long as the soil block has mostly sterile soil and the garden is fertile, then the process from seed to plant to fruit is quite smooth.


Hardening off the transplants in the garden


One flat planted out to another garden, one more to go.


-Another advantage to soil blocks is that they enable me to grow more. By being able to keep small plants growing in blocks while the plants in the garden are going through the gantlet of pests and weather conditions there is always a backup if a cutworm, slug or woodlice decide to make a meal out of a seedling. Additionally, crop rotation can occur much faster. When one crop is done producing, the second crop (which has grown for 3-4 weeks) can replace them. This enables the gardener to grow several crops in an area where only one was possible beforehand.


2 inch soil blocker on the right and 4 inch soil blocker on the left


-I’m never done learning: I recently began transplanting my 2” soil blocks into 4” soil blocks. I finally decided to invest in a 4” blocker. This soil blocker has a built-in 2” cube to pot-up the 2” soil blocks into a 4” block. The 4” blocks require a lot more materials and can take a while to learn how to make. The blocker itself looks like a oversized cow bell and, if you twist the top handle from side to side, sounds like one too.


2 inch soil blocks now in the compressed 4 inch soil blocks


A 1020 tray with soil blocks


What’s next? Although I am currently using 1020 trays (which I will continue to use) I am planning on obtaining some 1020 mesh bottom trays to increase the air-pruning underneath the soil blocks. I’m also planning on getting some carts to transport my 1020 trays from the greenhouse to wherever I want to harden-off or transplant my soil block seedlings.


Last but not least: Yet another amateur Youtube video - so you can see what I am talking about and so I can show off how my cucumbers are doing now.